Have you noticed that during operation the washing machine is very humming and vibrating? Perhaps the reason lies in worn drum bearings.
Bearing operation is designed for a period of 5 to 10 years. Details do not always reach this deadline and break earlier. In the article you will learn why this happens and how to remove the bearing from the housing of the washing machine for replacement.

Replacement Reasons
The bearing fixes the position of the shaft, ensuring its uniform rotation. These small parts take over the entire load.
If you are interested in how to get the bearing out of the washing machine, then you suspect that it has become unusable. The cause of this could be a damaged oil seal, which, having lost its tightness, began to leak water. The grease was washed, which led to corrosion and abrasion of the bearing.

Most users download the AGR according to the “how much will fit” principle. This is wrong, because over time, overload leads to wear of parts, including bearings. This can be seen by the characteristic rattle. It can be heard when spinning or while scrolling the drum by hand.
Another sign of bearing problems is leakage. If you find that water collects under the bottom of the washer, it's time to check.
Untimely replacement can lead to damage to the tank by the drum, deterioration of the spider and shaft. And this already threatens a major overhaul, in which it will be necessary to install a new tank and drum.
How to prepare for work
First you need to drain the remaining water from the washer, as you will need to completely disassemble it. Proceed sequentially:
- Turn off the power to the SM by removing the plug from the outlet.
- Having turned off all communications and shut off the water supply, drain the remaining water from the intake hose.

- Do the same with the drain filter. It is located under the front panel, behind a small hatch or basement panel. Open the panel by opening the latches with a screwdriver, unscrew the filter, drain the water.
Move the machine away from the wall as far as possible. Now prepare the tool to remove the bearings of the washing machine. You will need:
- a set of slotted and Phillips screwdrivers, possibly hexagonal;
- set of wrenches and socket wrenches;
- pliers;
- puller;
- hammer and chisel;
- bolt;
- sealant;
- hacksaw for metal.
Before buying a puller, make sure the bearing needs a replacement. Then purchase a universal puller suitable for dismantling items of any size.

Buy a new part. It can be a wheel bearing or any other that suits your model. You can find out the exact numbers and markings after you remove the bearing from the washing machine.
Self disassembling
Having completed the preparation, you can proceed to disassemble the AGR. Whatever brand your car is, the principle of repair remains the same.
Top and front panel
In some washers, it is not necessary to remove the front panel to remove the tank. But we will describe the most difficult disassembly:
- Use a Phillips or hexagonal screwdriver to unscrew the two bolts at the back of the top cover. Pull it forward and remove from the case.

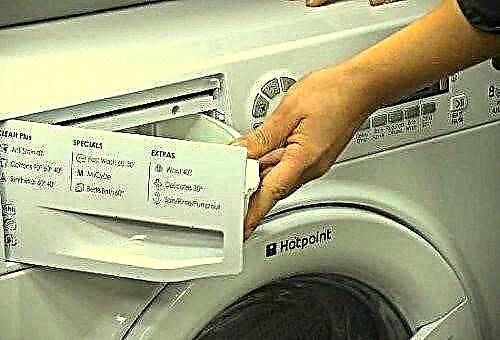
- Go to the front. You need to pull out the dispensing tray, which serves to fill the powder. Press the latch in the center and simultaneously pull the tray toward you.
- Remove the screws that secure the control panel.
- Using a flathead screwdriver, release the plastic latches.
- Without unfastening the wiring from the control unit, lay the panel on top of the chassis. If you still decide to remove it to the side, first photograph the location of the connectors, and then disconnect.
- Open the hatch door. Bend the edge of the sealing rubber - there is a clamp behind it. Pry it with a screwdriver and pull it off.

- Remove the two bolts securing the UBL (lock) of the hatch. With your hand behind the case, disconnect the wiring of the lock. Insert the cuff into the tank.
- Remove the bolts around the perimeter of the front panel, remove it.

Now you need to eliminate everything that prevents the tank from being removed. If your model has a heater in front, disconnect its wiring. Mark the location of the wires with a marker or photograph.
Also remove the front tank counterweights by unscrewing the bolts.
Rear housing
To remove the rear panel, unscrew the screws around the perimeter. Set the panel aside. You have access to details.
- First remove the drive belt. It’s easy: with one hand pull the belt toward you, with the other, rotate the pulley.

- Lock the drum pulley wheel with a wooden bar so that it does not move. Remove the central bolt. Gently pulling the pulley toward you, remove it from the shaft.

- Unfasten the wiring from the electric motor and the heater, if it is located at the rear.
- Unscrew the bolts holding the engine, pull it out of the housing.

How to remove the bearing from the drum of the washing machine - instructions
Loosen the drain pipe clamp and disconnect it from the tank.

It remains to unscrew the bolts of the shock absorbers, which can be located at the very bottom of the housing.

Top details
Remove the upper counterweight by unscrewing the bolts.
Now you need to remove the powder tray cuvette. Lift it up and disconnect the pipe by loosening the clamp with pliers. Remove the bolts securing the filler valve to the SMA housing. Disconnect the wires from it. Remove the cuvette with valve.

Disconnect the pressure switch hose attached to the tank. If nothing else interferes, lift the tank off the hooks and pull it out through the front or top of the SM housing.

Check and dismantle
Before you remove the bearing from the hub, you need to get the drum.
If you have a collapsible tank, simply unscrew the screws along the perimeter and remove the upper part.
If the tank is soldered, you will have to saw it. For this:
- Mark the places for future self-tapping screws along the perimeter. Make holes for them, so you can additionally fasten the halves of the tank.
- With the tank on its side, start cutting from the part that is convenient for you.


Having hit the sleeve several times with a hammer, push the drum out of the tank part.
Now you will learn how to remove the bearing from the drum shaft of the washing machine without a puller:
- Install a chisel on the outer ring.
- Tapping on it with a hammer, try to get the bearing.
- If it does not knock out, sprinkle it with WD-40 and wait a while.
In order to somehow knock out or remove the inner bearing shell of the washing machine, you can apply the same method, only aimed not at the outer but at the inner ring of the part. This method can be used if the part cannot be removed using a conventional puller.

However, the result raises another question: how to pull out the remaining outer bearing race? You can also knock it out or try to pry it with a puller.

After dismantling, clean the seat nest - the job you did. If the part was defective, reinstall the new one. Lubricate the sawn drum with sealant at the edges and connect the two parts. Fasten it with screws.
Now you know how to knock out and remove the bearing from the drum of the washing machine - you can put this knowledge into practice. A video on the topic will help you: